Music Soundtracks

There are many aspects of my job that are rewarding, but one of my favorite things is music for video.  Sometimes its a production for one of my clients and sometimes its for-hire from a third party.  The example I use for this article was done for the highly regarded firm, Cinemanix (Ohio and North Carolina).  SHOOTERSFINALThis group (led by Director/DP, Maz Mawlawi) is a talented and experienced film and graphics company.  Their client for this project was Home Savings and Loan, Youngstown, OH.

Soundtracks are a very subjective thing.  It’s important to consider the message the client wants to convey, and one would obviously want to know if they have a preferred musical style.  Regardless, there are a few things that I feel are necessary to consider when producing music for video.

  1. Combine (if possible) actual instruments with keyboard/electronic versions of them.  This is especially true with violins and strings.
  2. Despite the lure to use keyboard versions of percussion and drums, use real versions of them whenever possible.  The slight imperfections in timing and tone give the music an organic feel.BOARDFINAL
  3. When writing the music, try to use partial chords and incomplete scales during the body of the piece.  This allows for more interpretation and less leading-the-message from the music.
  4. Include one or more major tones of the scale when tagging the music or ending the video.  The message becomes clearer and more important as a result.
  5. If the customer can give at least one example of music they like, it can save a step or two.

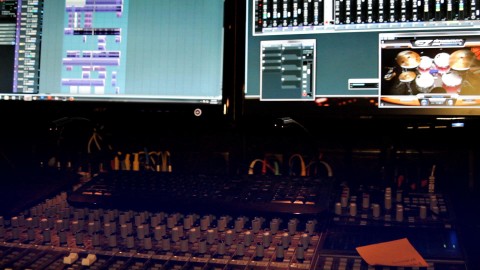
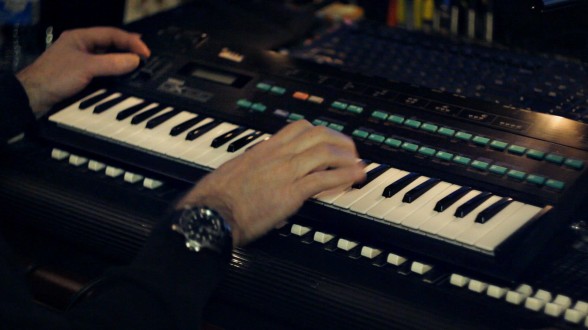
In this video, the shots from the studio are followed by the rough video.  The link to the final broadcast version is below the embedded video.

The final video as broadcast is here: 


Video the CEO

RMARTINRegular, personal messages from a company’s top executive aren’t just more popular, they’ve become imperative.  Unflattering media portrayals of CEO’s are commonplace and these short, informal videos can go a long way toward improving executive image.

Over the years, I’ve had the opportunity to do many video interviews with CEO’s.  Whether you’re producing a short message from your own small company’s president, or an interview with the skipper of a Fortune 500 company, here are some suggestions.

People who run corporations are usually very smart. They’ve made careers out of breaking down complex, gray-area issues into elementary components.  Decisions are made in an almost binary way.  They rarely like surprises, and usually rely heavily on their administrative assistant (AA).

Briefing the AA:

  1. Treat the assistant as you would a VP or divisional president.  Be warm, cordial, and extremely professional.  If they tell their boss that you seemed like a jerk, you will have a bad day.
  2. Provide a clear, one-page briefing regarding the purpose of the shoot well in advance.  Bulletize and generalize the message unless the delivery requires a recited script (then be very clear whether it will be memorized or prompted).
  3. Confirm details with the assistant five business days in advance.  While the CEO may know the event is calendared, they probably haven’t read the briefing sheet.  Tell the AA that you are available at any time if there are questions.
  4. Discuss, conceptually, your desired locations and let them know what time you’ll arrive for load-in and set-up.
  5. Provide the names of your crew to ensure that building security is ready for you and your equipment.  Even so, arrive early in case the security team decides to do visual inspections.
  6. Will they need to see the final version before it’s public?  Some companies insist on it.

A few years ago I did a two-camera, three-person-crew shoot with the CEO at a top-ten Fortune 500 company.JBOUCHARD  We arrived well in advance to set up in the office while a meeting finished on another floor.  As we completed the set-up, two of us sat down and rehashed the objectives of the shoot.  When I looked up, I realized that the third person (a recent college film graduate) was sitting in the CEO’s chair playing with the puzzles and knick-knacks at the desk.  I could only muster two words, “What?” and “No!”  Had the executive walked in at that moment, we correctly should have been marched up one flight of stairs to the roof and thrown off.

The Crew: 

  1. Don’t have one.  Unless you absolutely have to have a two camera shoot, do it yourself.  Today’s technology allows you to trim your kit so that you can carry all of the equipment in one trip.  Be efficient.
  2. Dress appropriately.  Khaki’s with a logo-embroidered golf shirt is an absolute minimum.  A suit may be overkill, but you must at least consider it.  The valet staff at the country club probably wears khaki’s and embroidered golf shirts.
  3. Meet for coffee and brief the crew ahead of time.  They shouldn’t sit at the CEO’s desk, for example.  Dear God, what is wrong with me?!

The best thing about getting to know CEO’s is that they are almost always awe-inspiring people.  While their job requires decorum, they are generally wonderfully passionate, and quick witted individuals.  In spite (or because) of this, they fall roughly into two categories as it relates to filming;  those RHARSHMANwith experience and confidence in their media chops and those that detest it.  You are as likely to find a nervous subject as you would with any other shoot.  While you may not think this is unusual, the CEO does.  Entire companies shrink in their presence, but that stupid camera changes them into a seven year old being bullied by a fifth grader.  This is not business as usual for them or you.

The Subject:

  1. All CEO’s have some media experience.  You will have no way of knowing whether it has been pleasant or not.
  2. Be prepared to take them off-topic if needed.  Chat about something they might be comfortable discussing.  A corporate acquisition, recent press coverage, future industry directions, or their daughter’s wedding.  Meaningful prior research is imperative.
  3. The tricky part is understanding that you are in the presence of the boss.  Giving direction is what you usually do.  They are not used to it.  Don’t apologize, but be apologetic.
  4. Be prepared for a “one and done” take.  Don’t ever assume you can take a mulligan.  I had a CEO  do one take and then look me straight in the eye and ask “Are we done?”.  Which, in this case, meant that we were.
  5. Make them look presidential.  Set up that kicker or extra hard light to give them some separation from the practicals.  Don’t forget your gels.  Corporate offices are notoriously surrounded by giant windows.  You will have mixed lighting.
  6. If they are comfortable, I sometimes ask for a second take with the camera/shot at a different position allowing cuts if necessary.

Executives are my favorite subjects, and it has nothing to do with video.  There tends to be more laughter and meaningful conversation than I have in the rest of my day.  Have fun!

Recording Vocals for Music

MACYAlthough I have over twenty years of recording experience, I don’t present myself here as an expert.  I simply offer tricks that have worked for me over time.

Almost all of the home-studio savvy musicians that end up at Mud-Hut have one of two issues; drums or vocals.  I’ve previously given my opinions on recording drums.  So what is it that makes vocals so troublesome?  Most of my clients describe two problems.

  1. Fluctuations in volume.  The vocalist is too loud in some passages and too soft in others.
  2. The inability of the final performance to “sit in the mix”.  Even with volume issues corrected, the vocal track is either underneath or on-top of the music.

Volume Fluctuations:

Let’s assume that the vocalist has some respect for the microphone as an instrument.  Screaming into a very sensitive, condenser mic presents the opposite issues that standing back from a durable, dynamic stage mic can.  Let’s also assume that the signal chain (microphone into pre-amp into computer interface) isn’t out of whack and there seems to be plenty of headroom with no distortion.  These are heavy assumptions, but if you don’t have at least this much…then inconsistent volume and mix placement are not yet your worries.

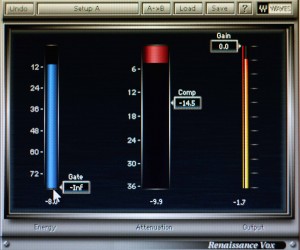
  • RVOXIt’s all about compression.  I compress vocals on the way IN to the converter, but it’s not necessary.  You will, however, absolutely have to compress/limit recorded vocals with a plug-in as an insert.  There are many available.  I use Waves R-Vox and squash the signal as much as required.
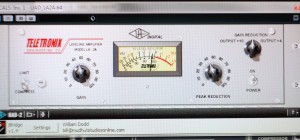
  • I tend to lightly use an Optical Compressor on the Vocal Group (ie. all vocals).  I utilize the UAD LA2A for this.  Compressors are not used here as special effects… If you can hear processing, you’ve overused them.  Listen for the corrections they’ve produced.

    LA2A

    Vocal Opto-Compressor

Mixing Issues:

All microphones have distinctive frequency signatures as do all singers.  Matching mics and vocalists is an art that implies patience and a large microphone collection.  If you have a microphone locker, then why are you reading this?  Forget about it…

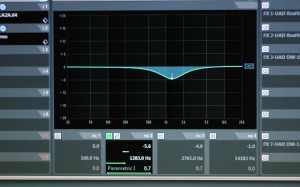
  • It’s all about the EQ.  Take a wide-ish band around 1 kHz and cut it moderately/aggressively.  You should notice that the vocals begin to sit.  Don’t hesitate to use a light, short, understated reverb as an assistant.

    EQ

    Vocal EQ

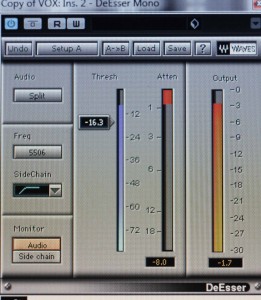
  • Since this EQ cut can reveal and over-emphasize high frequencies, you’ll need to use a De-esser plug-in as an insert to catch the sibilance (S’s) so the high-end doesn’t get away from you.

    DS

    De-Essor

  • It will also potentially give you a problem with the low-ish end, and you may have to address a frequency like 250 Hz and cut it slightly to return the voice to a natural sound.  Use your ears and don’t be overly aggressive.  Slight EQ is usually enough.


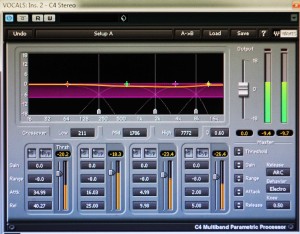
  • Some vocalists tighten their vocal cords when they strain and this can create a most unflattering tone (around 2.75 kHz?).  It will sound inconsistent and edgy.  You may have to pursue another plug-in.  In this case, I use a multi-band compressor.  Yes, this is a combination EQ and compressor.  It compresses (controls) only the frequencies you tell it to.  Set it to grab generally only the frequencies of the passages that irritate you.

    C4

    Multi-Band Compressor


These tools are like any instrument.  If you aren’t playing it… you’re playing with it.  Practice is the only teacher.


Recording Drums… Part Three

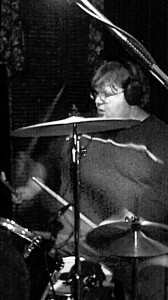
DRUMS JOSHThere are hundreds of dissertations on this subject around the web.  Many written by people far more qualified than I.  However, since I’ve recorded 400+ different kits over the years, and customer satisfaction has generally been high…  This is Part Three.

I Usually… One:  Take a wide-ish band at 500Hz and cut it aggresively on the toms.  This is the boxy tone that nobody misses.

I Usually… Two:   That pesky energy node you’ll probably get on the toms at 200Hz isn’t going to go away unless you spend a month tuning… forget about it. Set a narrow band on the eq and try to notch it out either while recording or while mixing later.

I Usually… Three:  Cut 100Hz or so on the kick drum.  I know…I know… that’s the frequency that some people will tell you to boost, but it pushes to much energy into the compressor.  You don’t have to get crazy, but as you drop this freq, you’ll hear some awesome sub tones DRUMS PIGGYthat seem to expand the size of the kick.  You’ll also have to make a wide, gentle boost some place in the upper midrange to show the slap of the beater.  If you hear a weird “clacking”, “beeping” or other unnatural sound, figure out the frequency and… notch it.  I don’t usually boost any low frequency on the kick unless genre=metal then I’ll boost 44Hz a tiny bit with a more severe 100Hz cut.

I Usually… Four:  Put some level of compression on all individual drums.  Very light on the toms, a little more on the snare, and quite a bit on the kick.  Yes, we’re shaping the tone, but we’re really looking for some level of consistency in volume across the kit.

Oh Crap!  Too much cymbal:  They’re in everything and if that weren’t bad enough they’re flanging because of the phase differences at each mic making the drums virtually unlistenable.  Let’s figure out why.

  1. The room is usually the number one culprit.  The cyms just seem to multiply everytime they’re struck.  You’ll have to deaden the room or move the kit to a larger space.
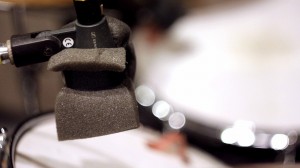
  2. Mic placement is usually the next bad guy.  Solo each mic to find the trouble maker(s) and make adjustments in the way they’re placed. Crashes eat up tom mics and the ride is almost always facing the capsule of the snare mic.  I’ve rubber banded pieces of foam to the sides of mics to help with this.DRUM FOAM but asking the drummer to either move his cymbals or change the way he/she plays may be the only way out.  Depending on your situation, you may have to remove the offending cyms and have the drummer play them as overdubs.  I’ve not done this, but it was common back in the day…
  3. Make sure your overhead mics are in the best possible position to capture a balanced drum vs cymbal performance and as the drummer plays make sure that you sweep from pan to center (mono) to listen for phasing.  Correct accordingly.
  4. I’ve found that almost all drum tracks have too much cymbal in the tom mics.  I just mute the tracks in between tom strikes.

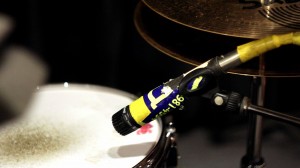
The Snare:  Don’t over compress!  Make sure you can hear enough snare band.  Need more snare in the mix and pushing the volume doesn’t really help?  Build a reverb that does it.  There are tons of plugins that let you set early reflections, tune the verb, and simulate natural rooms and environments.  These can/willDRUM SNARE MIC make your snare as big as you want it without sounding too reverb-y.

I don’t consider myself an expert, just someone who’s had the remarkable opportunity to mic a lot of drum kits.  twenty years from now, there may not be many engineers around who will have recorded more than 10 kits.  Music has changed.  Anybody who’s used sample/replace software knows… but if you have a real band and a  real drummer, who wants to hear real drums, mic’ing is easy…  Part One.  or Part Two.

Recording Drums…Part Two

DRUMS KEITHThere are hundreds of dissertations on this subject around the web.  Many written by people far more qualified than I.  However, since I’ve recorded 400+ different kits over the years, and customer satisfaction has generally been high…  This is Part Two.

There was a session several years ago when the band had finished recording all of the basic tracks and were starting to overdub guitar parts when one of the band members asked, “Where did (the drummer) go?”  None of us had seen him since the last trip to his car after tear-down…it had been at least UNDER EVERYTHING DRUMMERa half hour.  It turns out that he had packed his car and quit the band.  He drove three hours back home without saying goodbye thinking he was saving the band the messiness of quiting before he had recorded with them… Probably not the right call…

No Worries One:  Really cheap tom mics are fine.  You’re only going to use them to augment the overheads and bring attack, body, and increased volume to the toms anyway.  That sounded surprisingly like a shampoo ad.

DRUMS FROG AND GUMNo Worries Two:  Remove all of the damping, tune and reapply moon gels cut in half.  Full gels kill too much area.  If you have to, use two halves in different spots.  Drum Gum is also really effective.  I actually use little frogs that I bought at a party store which are made out of the same stuff.  Part Three.  or back to Part One.

Recording Drums… Part One

ROB DRUMMINGThere are hundreds of dissertations on this subject around the web.  Many written by people far more qualified than I.  However, since I’ve recorded 400+ different kits over the years, and customer satisfaction has generally been high…  This is Part One.

After recording and mixing a session one day, a band member asked, “What did you do to the drums?”  His wording surprised me.  I thought they sounded pretty good.  “Umm, what do you mean?” I asked.  His reply;  “Well, they sound so good…  So natural… What did you do to them?  The last studio I was in spent two hours on the snare drum alone, and we didn’t record anything the first day of the session because we worked on the drums the entire day.  You just threw some mics up, turned a couple of knobs and said, ‘OK, now guitar.’  Do you have a secret processor or something?”DRUMS CM

I do not.  I have no secrets of any kind, and I have never substituted a drum sound using sample-replace software.  It just seems so unfair to the drummer.  Hey, guitar player, I don’t like the tone of your amp; let’s replace you and your little dog too.

There are a couple of things that I’ve done over the years that have given clients consistent results.

I present these with the humility of someone who has been in situations where nothing really worked and despite my best efforts the drums didn’t sound like they should have.

DRUMS DAVEAssumption One:  The drummer can play.  He/she actually strikes the drums with authority and confidence.  Touch drummers do not record well.  You really have to be on your game when recording a jazz oriented player who strikes lightly.

Assumption Two:  The drums aren’t complete garbage.  I tracked a kit once that was cobbled together from three different below average drum sets.  However, the top heads weren’t dented and he hadn’t removed the bottom heads (important).  Once we removed all of the duct tape and retuned, they recorded fine.  I am partial to maple shells, though.  They just seem so focused.

Assumption Three:  You have some idea how a kit is supposed to sound, and you aren’t afraid to help the drummer tune it.DRUMS KICK MIC

Good Idea One:  Two heads are better than one.  You can’t fake this.  There’s a reason that drums have two heads.  The kick drum can be the exception, however.  If it has a hole, put the mic inside the drum, and you’re in business.  Otherwise remove the front head.   If you’re going for a flabby/indie/70’s sound you may have to keep it and mic from outside the front.

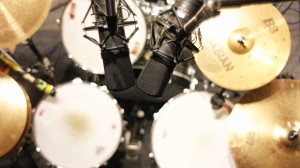
Good Idea Two:  Get two good overhead mics.  They are your drum sound.  I’ve used different ones over the years, and I found that I liked affordable, natural sounding microphones.  I settled on ADK Area-51’s.  Properly placed, you can shut off all DRUM OVERHEADSof the other mics except the kick and hear the real drum sound.  If you’ve been searching for overheads, I highly recommend you audition these.  You won’t need a hihat mic either.  I’ve never used one.   Part Two.